Like real cars, RC cars require a routine cleaning or a wash after usage for better performance and longevity. Cleaning protects RC cars’ components from dirt and debris and prevents many unwanted mechanical issues.
However, cleaning an RC car does not seem like directly splashing forced water into the car. Since it is an electronic device, you must follow precise steps to clean it safely.
In this article, we will share the systematic cleaning steps for RC cars recommended by manufacturers and experts.
Read and enjoy.
Essential Tools and Materials for Cleaning an RC Car
Before starting the cleaning process, ensure these items are available near your hands.
- A Soft brush, like a bristle brush.
- Compressed air can.
- RC vehicle cleaner or mild soap.
- Freshwater.
- Soft towel or microfiber cloths.
- Lubricants
Step 1: Preparing Your RC Car for Cleaning
For cleaning your RC car without damaging it, ensure that you have followed each of these safety precautions.
Disconnect the battery from the car.
You must disconnect the battery from the car for safe cleaning. It is crucial to avoid electric shocks and damage to other electronic components of the RC car during cleaning.
Remove loose dirt or debris from its surface.

Brush off loose dirt or debris from the surface of the car. Removing them will help you prevent any scratches on the car’s body during cleaning. You must use a soft bristle brush to wipe off the grime.
Protect sensitive components, like electronic parts, air filters, etc.
Do not spray water or cleaning liquid directly onto sensitive parts of the car. Instead, clean them using a soft brush or compressed air. You can cover these parts with plastic bags or similar waterproof materials for the highest safety.
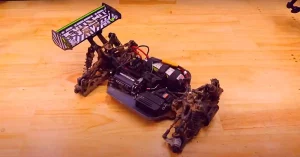
Before cleaning, you must also disassemble the RC car following the manufacturer’s guidelines. Here are some examples:
Remove the body shell of the car first.
Begin the disassembling process with the car’s body shell. Without forcing to remove it, find the fasteners like clips and screws and detach them using appropriate tools. Removing the shell will give you better access to cleaning the car’s chassis and components.
Unscrew all electrical components from the chassis.
Ensure that each electrical part on the chassis is carefully removed. Since we will wash the chassis with water and cleaner, they can be damaged in contact with those substances.
Separate the wheels, shocks, and other removable parts.
If these parts of your RC car are detachable, separate them too. Detaching them will help you clean the hard-to-reach areas of the car, including the suspension components, rims, etc.
Step 2: Cleaning the Exterior of the RC Car
After preparing and disassembling the car, start cleaning its exterior following these methods.
Brush off excess dust and dirt from each part.
Use a soft bristle brush and a clean cloth to remove the remaining dirt from each part of the car.
Use compressed air to blow away the remaining particles.
RC cars have many small parts with hard-to-reach areas where using a brush is inappropriate. You should use compressed air cans to blow away the remaining particles in those areas.
Wash the shell with soapy water.
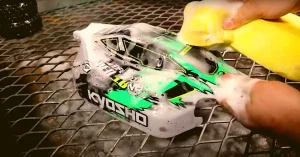
Mix mild soap and water to prepare a cleaning liquid. Soak a sponge in the liquid and scrub the car’s outer body with it. After scrubbing 2 to 3 times, wash the shell with fresh water. Finally, use a microfiber cloth to dry it.
Once you have finished cleaning the outer area of the car, move on to the chassis and wash it, applying recommended materials and methods.
Gently scrub the chassis with a soft brush.
Use a bristle brush to scrub the car’s chassis to remove leftover dirt. Do it carefully so you do not scratch the chassis. The goal is to loosen dirt from the chassis, not thorough cleaning.
Wash the chassis using cleaner and water.
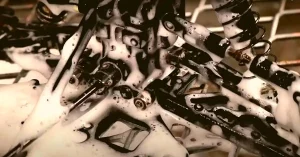
You can use homemade soapy water and RC cleaners to wash the chassis. Soak a sponge in the soapy water and scrub the chassis thoroughly. In some areas of the chassis, spray the RC cleaner and scrub them with a small brush. When scrubbing breaks down the dirt and grime, pour freshwater on the chassis and wash it well. However, do not use pressurized water to complete the task fast.
Dry the chassis carefully.
After thorough washing, you must dry the chassis to avoid water spots and corrosion. Use microfiber cloths or a soft towel to soak the remaining water. Also, pay particular attention to tiny areas where water can hide. You must ensure that the chassis is completely dry before reassembling.
Complete the exterior cleaning by washing the wheels and tires of the RC car.
Scrub the wheels and tires with a brush and mild soap.
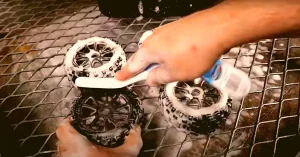
Take a soft brush soaked in soapy water and scrub the wheels and tires in a circular motion to break down the dirt and stuck debris. Also, focus on cleaning the thread of tires particularly.
Rinse and dry thoroughly.
After scrubbing, wash the wheels and tires with fresh water to remove soapy water and loose dirt. Now dry those wheels and tires properly using a soft towel and microfiber cloths. Ensure that the hard-to-reach areas are dried well.
Step 3: Cleaning the Internal Components
Here, we will clean the electrical components and drivetrain with particular attention that we disassembled before.
Use compressed air to blow dust and debris.
Use a compressed air can for blowing the pressurized air through the small electric components like the servo, speed controller and receiver. It will easily remove the gathered dust and debris on those parts.
Inspect whether there is any moisture or corrosion.
After removing debris, check those electronic items carefully to see any signs of moisture and corrosion. If you find them, use an electronic cleaner to remove them.
Gently rub electrical components with wet cloths.
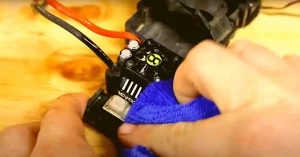
Spray RC cleaner in a microfiber cloth to make it wet. Now rub the unscrewed electronic parts softly using the cloth. Be careful so no drop of the liquid goes inside those devices.
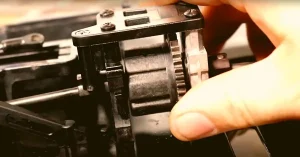
Clean the gears, belts and driveshaft on the drivetrain.
For cleaning those parts on the drivetrain, use a soft brush, compressed air and RC cleaner. Gently rub out debris, or blow dust with the compressed air. Spray the RC cleaner where needed and wipe with microfiber cloths to clean them. Finally, lubricants can be applied to gears and other moving parts to reduce friction.
Step 4: Reassembling and Storing the RC Car
After drying all electronic parts, chassis, wheels and others, we will now reassemble the RC car following these sequences.
Attach the wheels, shocks, and other parts.
Do not reassemble the car’s part randomly, as reattaching requires the correct sequence. You can begin with assembling the wheels, shock, etc. However, following the manufacturer’s instructions for proper assembling and alignment is highly recommended. Also, do not forget to use appropriate tools for assembling.
Reinstall the body cover.
Finally, place the body cover of the RC car on the chassis and fasten it well. Ensure that the shell is aligned correctly and carefully installed.
Lubricate the moving parts of the car.
It is a good practice to lubricate the moving parts of the RC car before storing or reusing it. Apply high-quality lubricants on recommended parts like the bearing, gears, suspensions, etc.
Store the RC car in a clean and dry place.
If you do not drive the car right after cleaning, store it in an appropriate place. Ensure that the place is free from dust, moisture and excessive temperature. Using an RC car protective bag is highly encouraged to protect the vehicle from environmental damage.
Frequently Asked Questions
Can I wash the chassis of the car with water?
It depends on the material and design of the chassis. Washing a chassis with water made of water-resistant material is completely fine. However, you must disassemble all electrical components from the chassis before such washing.
How often do you need to clean the RC car?
Cleaning an RC car once a month is sufficient to protect it from dust and debris. But many users prefer cleaning them after each use, particularly after bashing the competition.
Can I wash any waterproof electrical components of the RC car with soapy water?
Remember that water resistant and waterproof are two different things. Some manufacturers mention electrical parts as waterproof, which are actually water resistant. They can protect sprinkles of water, not water drops. Wiping with a wet cloth is a good practice to protect those devices from water damage.
Final Words
Without a doubt, regular cleaning is a crucial part of RC car maintenance. It enhances the car’s longevity and performance over its lifetime. However, a safe cleaning process is highly encouraged to avoid damage while washing the car. You must handle the vehicle carefully and pay extra attention to the sensitive parts during cleaning. Though it takes time and effort, finally, it gives you a neat and clean RC car for the next race.